
|
||||||||
|
|
||||||||
A Comparative Pictorial Study of the Wards and Techniques of the late 13th century Sword & Buckler Manuscript I.33, or Tower Fechtbuch* Editors note: the images of these guards do not reflect current ARMA curricula as of 2008
|
|||||||||||||||||||||||||||||||||||
 1st Ward |
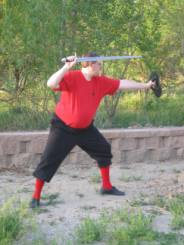
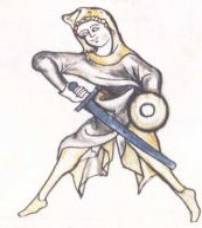
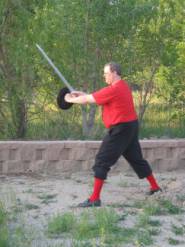
2nd ward - The I.33 says the second ward is given to the right shoulder. The buckler is held straight out from the Left shoulder facing forwards. The sword is held on the right shoulder with the sword pointing backwards and can be held horizontally or on an upwards slope or on a downwards slope with the knuckles of the right hand and the true edge of the sword facing towards the sky. This ward is most naturally done with the left leg forward. The picture on plate one shows the sword with a slight downward slope. This ward is similar to Liechtenauer’s longsword guard Vom Tag when it is held at the right shoulder and was also named zornhut or the “guard of wrath” by Joachim Meyer.
 2nd ward |
 Vom Tag or Zornhut |
3rd ward - The I.33 says this ward is given to the left shoulder. The right arm is crossed over the top of the Left arm with the sword pointing backwards and on an upwards slope with the knuckles of the right hand and the true edge of the sword facing towards the sky. The buckler is shown facing to the outside, or to the left with the left arm extended straight out from the shoulder, the elbow may be slightly bent. This ward is naturally performed with the right leg forward. This ward may also be considered to be similar to Liechtenaur’s longsword guard of vom tag when it is held at the left shoulder. The 3rd ward could also be considered to be a similar guard to Achille Marozzo’s Guardia di Sopra il Braccio or the overarm guard and therefore may be a variation of the 1st ward that is an ending position that results from cutting over your buckler instead of under it and finishing in the 3rd ward rather than the 1st ward.
 3rd ward |
 3rd ward or Left Vom Tag |
4th ward - The I.33 says this ward is given to the head. This stance is similar to the second ward, but the sword is held above the head instead of at the right shoulder. The sword is held above the head and it is pointed backwards, it may be horizontal or inclined upwards or downwards at an angle with the knuckles of the right hand the true edge of the sword facing up. Either leg may be forward with this stance, although the left leg will probably be the most common one in front. This allows for a powerful downward cut from the right to the left (a zornhau) when combined with a passing step. When the left leg is forward, the buckler is held closer to the body in order to allow this strike without telegraphing it by pulling the buckler back. This ward is similar to Liechtenauer’s longsword guard vom tag or "the roof." It is also similar to Achille Marozzo’s Guardia di Testa or “guard of the head.”
 4th ward |
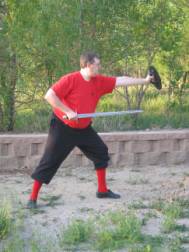
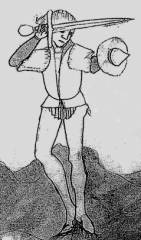
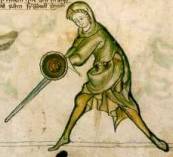
5th ward - The I.33 on plate #1 says this ward is given to the right side, but the illustration is on plate #2. This is an open stance; the only one shown in the I.33, unlike Talhoffer whose manual is full of open stances with a buckler. The buckler is held straight out in front of the body with the left arm extended straight from the left shoulder and the buckler facing to the outside or the left side. The sword is held low near or slightly behind the right foot with the right arm straight or just slightly bent. The sword is pointed backwards at a downward slope with the knuckles of the right hand and the true edge facing down. This ward is similar to Liechtenauer’s longsword Nebenhut or “Near Guard” when it is held on the right side. It is also the same as Achille Marozzo’s sword and buckler “Long Tail” guard or Coda longa e distesa. Talhoffer shows a different form of this ward, held with the point forward, rather than back as in the I.33 though he labels this guard as one of two open stances in his 1467 manuscript and does not use the word Nebenhut, though I have labled several images of his guards with specific names for the sake of comparrison to the I.33. Marozzo also has this variation of the “Long Tail” that is held with the sword pointing forward instead of back and labels it Coda longa e larga. Both Coda longa e larga and Coda longa e distessa may have either the right or the left foot forward.
 5th ward |
 Nebenhut |
 Coda Longa e Distesa |
|
6th ward - The I.33 on plate #1 says 6th ward is given to the breast, but the illustration is on plate #2. This ward differs from the first five but it is similar to the 7th ward or langort, because the sword is pointing forwards instead of backwards. The left arm is holding the buckler extended straight from the left shoulder with the buckler facing forwards. The right arm is bent with the elbow pointing backwards, and the sword held horizontal pointing forwards with the right hand held at the right pectoral or chest muscle and the knuckles with the true edge of the sword pointing down. This ward feels most natural with the Left Leg forwards, however the picture in the I.33 appears to have the right leg forward due to the line of the back and the way the hips appear to be cocked. This guard is also the closest guard in the I.33 to a normal german Ochs or “Ox” guard, but it is held much lower. However, it also bears a strong resemblance to the Bolognese Cinghiale or “Wild Boar” guard with the caveat that 6th is held at the breast or chest whereas the “Wild Boar” is held more at the hip.
 6th Ward |
 Wild Boar |
 Ochs |
 Ochs |
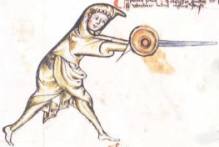
Langort (the 7th ward or long-point) - The I.33 on plate #1 says the last ward is Langort, but it is illustrated on plate #2. This ward also has the sword pointed forward. But, it comes in several flavors. There is the normal langort, the “middle” or “extended” langort, the “upper” langort, and finally the special guard of the priest, also known as langort.
The normal langort, shown on plate # 2, is performed with a straight left arm that inclines downward at about a 45-degree angle towards the ground, with the buckler held facing outwards or to the left. The right hand is also straight and extended downwards at about a 45-degree angle towards the ground with the sword held pointing forwards in a straight line from the right hand towards the ground with the knuckles of the right hand and the true edge of the sword facing down.
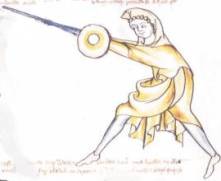
The “middle” or “extended” langort has both arms fully extended horizontally, straight out from the body at shoulder level. The buckle may be held on either side of the right hand, depending upon which side the most likely threat will come from. Either leg may be in front, but the version shown below has the left leg forward. This position is a good place to end a thrust in.
The “upper” langort has both arms extended straight out in front of the body, much like the “extended” langort, but the hands are raised higher than the shoulders so that the arms and the sword point up at an angle. The buckler is held on the left side of the right hand, and the figure shown below has his right leg forward.
The “special langort of the priest” is similar to 1st ward and is performed with the sword on the right side pointing downwards but it is not held underneath the left arm. The special langort is similar to the Weschel or the 'changer' guard from the Liechtenauer german longsword tradition which is simply an ending position resulting from the action of a zornhaw or “wrath strike”. The position of the sword in the special langort may be held in a similar manner to the one held by the first figure in Joachim Meyer's chapter on German Rapier from 1570.
 Langort |
 Extended Langort |
 Upper Langort |
 Special Langort |
 Joachim Meyer’s Rapier Guard |
|
Walpurgis’s Ward – This ward is not listed as one of the main seven wards. However, it appears to be a variation of the 2nd ward. It is done with the left foot forward, but the right hand is lower than 2nd ward and the sword is held on the right side with the point straight up, and the Buckler is held closer in to the body, with the face of the buckler pointed to the right. It is also similar to a variation of Liechtenauer’s longsword guard Vom Tag when it is held low at the right shoulder instead of higher up over the right shoulder as is done with the 2nd ward.
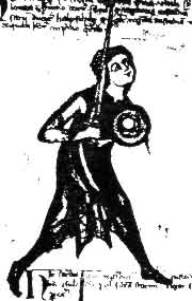 Walpurgis ward |
Vidilpoge (Fiddlebow) – On the top of plate 43, the Priest introduces a common ward named Vidilpoge (fiddlebow). This ward is similar in nature to the Liechtenauer longsword guard that is known as the Schrankhut in that it forms a barrior, except the point is up instead of down. A version of the Schrankhut guard is also shown by Hans Talhoffer. Talhoffer does not name this guard as Schrankhut, but instead he named it as the second of two open stances in his 1467 manuscript. For comparison’s sake I have labeled his illustrated guard as Schrankhut. I think that Vidilpoge is a starting point to move through Schrankhut, and that you may move back and forth between the two as if playing a fiddle as circumstances dictate. To stand in Vidilpoge, place your left leg forward, and hold the left arm extended straight out from your shoulder with the buckler facing forward. The sword is placed over your left arm with the inside flat against your forearm, with the point directed upward at an angle towards your left, as if it is the bow of a fiddle.
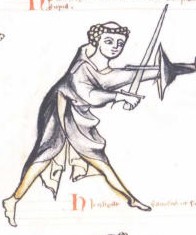 Vidilpoge |
 Schrankhut |
Obssesio or Oppositions in the I.33.
The Obssesio or Oppositions are counter-wards to the wards shown above. They are used as an opposite or opposing position to counter or break the wards. They are the best way to attack a specified ward and their use is shown throughout the plays of the I.33. Interestingly enough, the normal wards can also become obssesios, for example the 1st ward may oppose the 1st ward. They are as follows.
Halpschilt (half-shield - the 1st contrary or displacement) - This obssesio has both arms extended forward with the arms slightly bent and the hands held just slightly lower that the shoulders at about the height of the upper chest. The buckler is facing to the outside or to the left side, and the right and left hands are placed very close to one another so the buckler can cover the right hand. The buckler can remain on the left side, or it can cross to the right side by crossing over or under the right arm at the wrists to face to the inside or to the right. Either the left leg or the right leg can be forward, but the most used and natural position is with the left leg forward, especially against 1st ward as it allows one to defend the right side of the body with either a passing step with the right leg either forwards or backwards. This counter or contrary is similar to Liechtenaurer’s longsword guard of pflug and variations of the guard may be seen in other author’s works such as Talhoffer, Wilhalm and Mair.
 Halpschilt |
 Phlug |
Langort (long-point) – See above. Langort is frequently seen as an obsessio as well as a ward or guard. The normal langort is the one commonly referred to as the 7th ward, while the others are usually used as oppositions. However, the normal langort is also used as an opposition. (See langort under the ward or guards section) The normal langort is similar to the German longsword guard known as Alber.
 Langort |
 Alber |
Krucke (crutch) – The Krucke is called a rare opposition that is only used by the Priest or his clients, however it strongly resembles one of the two forms of german longsword Schranckhut guard and is also shown in Talhoffer though it is not labled as such by him. This form of Schranckhut is held with the sword on the inside of the buckler instead of on the outside. This displacement is a very strong position to protect oneself against strikes from all directions. It is performed by holding both arms extend out in front of the body with the hands held just a little lower than eye level. The buckler is held facing to the outside or to the left, and the sword is held with the knuckles of the right hand facing away from you and the point of the sword pointing at the ground. Both hands are held next to one another and the buckler can rotate and cross over the top of the right wrist to face to the inside or to the right in order to protect the sword hand on the right side, or return to its original position to protect the sword hand on the left. If the Krucke is used to close off the openings on the right side, then the left leg is forward. If the Krucke is used to close off the openings on the left side, then the right leg is forward. From this position you can counter a blow with a winding forward thrust that rotates the right wrist in a clockwise direction to bring the point of the sword forward, or by raising both arms and plunging the point of the sword down into a descending thrust. You can also do either an overhand or underhand cut from this position. Hans Talhoffer also shows this guard but does not assign a name for it, once again I have chosen to label it as Schrankhut for the sake of this article.
 Krucke |
 Schrankhut |
Schutzin - (cover) – This isn’t so much a ward,
as a position that you move through. A couple of easy ways to reach this
transitory position is from either Langort by rising up into it,
or from 2nd and cutting down through it. It is shown with both arms extended
out, as if in the middle of a cut, with the sword arm crossing over the
buckler arm with the buckler on the outside of the right hand facing to
the right. The right leg is forward and is probably the result of a passing
step. The I.33 tells us that every guard holds a “cover”. Interestingly
enough, this position is similar to a variant of Andres Lignitzer’s Zweien Schilten (or paired shields) and may be a form of ochs that is similar to the upper hanger in the Liechtenauer German long sword
tradition. (For more information see the article on Andres Lignitzer's
sword and buckler that is labled “Liechtenaur’s sword and buckler
teachings” by Keith Meyers:
http://www.thearma.org/essays/LeignitzerSandB.htm)
 Schutzin |
|
 Ochs |
 Ochs |
Some of the common attacks of the I.33
Since many of the pictures from art and other manuals show techniques in action, it is a good idea to show some of the common signature attacks of the I.33 for comparative purposes.
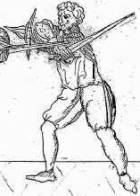
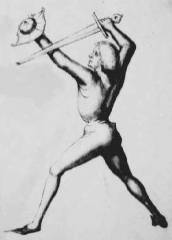
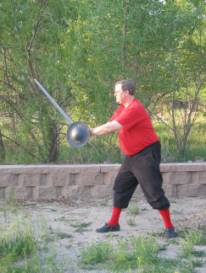
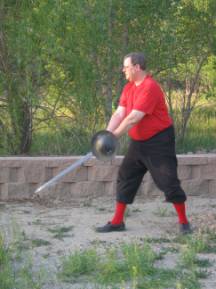
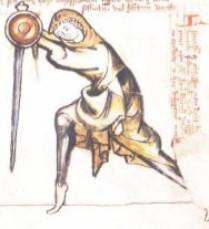
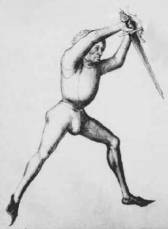
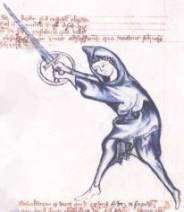
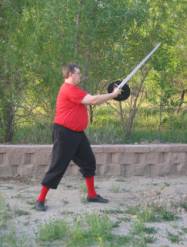
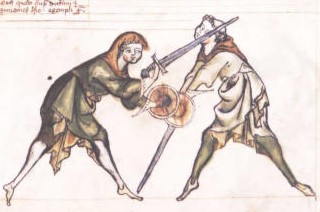
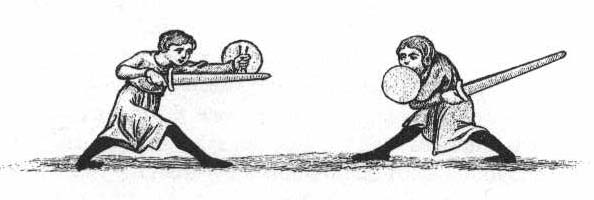
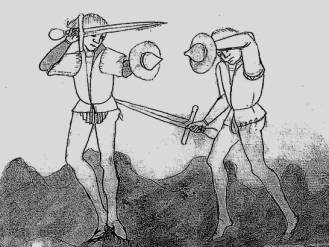
Schiltslach (shield strike) – This is the one of the main signature attacks of the I.33. It takes place after a bind and is used throughout the manuscript. It involves stepping out of the bind or rebind and pressing or hitting your opponent arms with your buckler in order to bind them up and then following up with a finishing stroke from your sword. This strike may be a true edge or a false edge; it may be a rising or descending cut. The I.33 doesn’t give us specific directions, but the image shown could be a rising true edge strike to the Priest’s head, or a descending false edge strike. It is also illustrated in several other german manuscripts though it is not labeled as a shield strike.
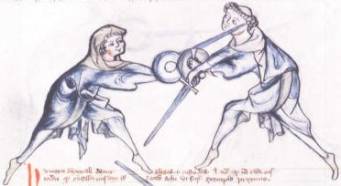
Stichslach (thrust strike) – Another common attack in the I.33. It is frequently done from half-shield into long-point while stepping towards your opponent. It is a thrust combined with a shield strike. It should be noted that a Stichslach is a different technique than just a stich or thrust, which is also a common attack in the I.33.
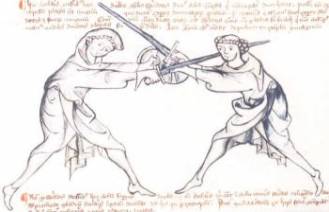
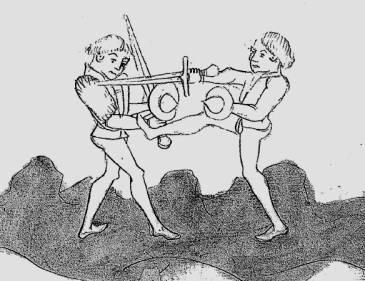
Durchtritt (step through) – This is another attack in the I.33. It is spoken of on plate #17. We are told to press the sword down and then “step through” This is then followed by a strike on either the right or the left side. At the top of plate #18, we are shown the end result, which seems to be an attack on the Priest’s hands. It appears to be similar to a german long sword technique known as Durchlauffen (running through), which is a technique to close against your opponent when his arms are up high, as they are in the bottom of plate #17, by going under his arms. If his arms are low, you should instead seize them as shown below in the next attack.
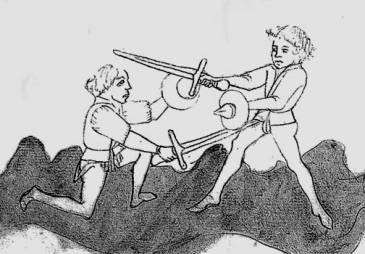
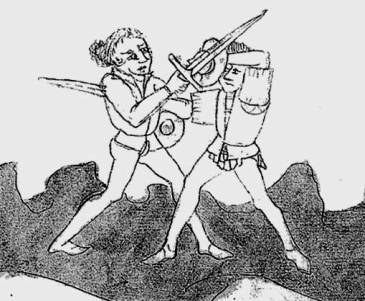
Seizing your opponent – From a bind, if your opponents arms are low, one may choose to seize or grasp his opponent by encircling his opponent’s arms with either his own left or right arm. Here are two good examples from the I.33. One must be careful, because grappling may happen after you have seized your opponent or he has seized you and either outcome may leave you disarmed while your opponent may still retain his weapons.
 |
 |
A Comparative study of the I.33 to other Artwork
With the groundwork in place, we can now move onto other Artwork and easily identify its similarities to the above guards, oppositions and attacks from the I.33.
1st ward
The 6th Ward with the right foot forward against the 1st ward with the right foot forward.
Same as above.
Ochs with the left leg forward against the 1st Ward with the Left foot forward.
Ochs with the left foot forward against the 1st ward with the right foot forward.
Fiddlebow against the 1st Ward with the right foot forward.
The 5th ward with the right foot forward against the 2nd ward with the Left leg forward.
A form of Shutzin (cover) or a possible false edge descending cut as seen below.
A block with the buckler combined with a leg strike against a false edge, descending cut.

In the center of this picture is a figure standing in 2nd Ward.
A possible langenort (long point) or nebenhut against the 2nd Ward.
The 2nd man from the left may be standing in Halpschilt (half-shield) while the man at the bottom is in a possible version of the 2nd ward. The artwork in this image makes it difficult to be sure of exact wards.
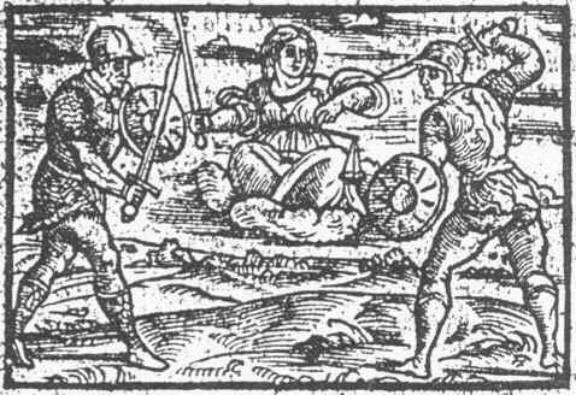
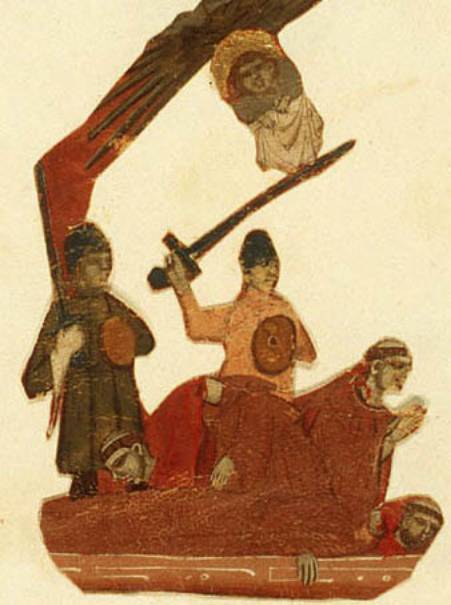
On the bottom left we have a fighter that has either fallen or been thrown down trying to defend himself against a fighter preparing to strike him from 2nd ward. In the middle we have a fighter in a variation of 5th ward against a sword and shield man who would be in 2nd ward with a buckler.
In the middle of this picture is a man standing in the 4th ward versus a Man standing in Ochs.

On the left we have a version of Vidilpoge (fiddlebow) against a man standing in a variation of Schrankhut (barrier guard), which is a version of Vidilpoge (fiddlebow) in my opinion.
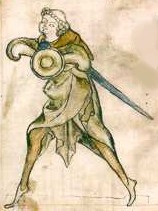
The Saint George Guard, this may be a version of the 4th ward because it is held at the head.
This is a thrust against what appears to be a version of 1st ward.
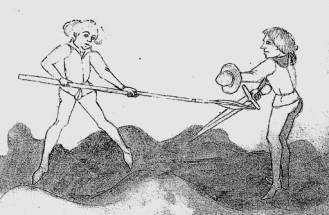
A fighter standing in the 2nd ward attacking a man with a spear.
The man on the left is in a variation of the 5th ward fighting a man with a sword and shield who is in a hanging ward.
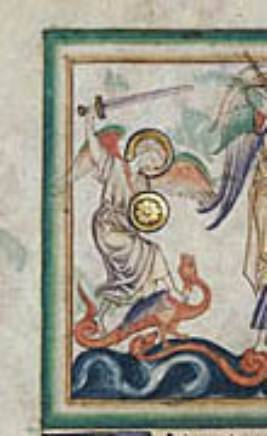
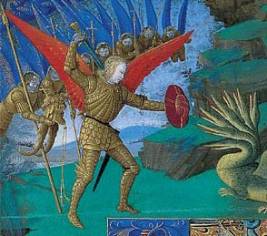
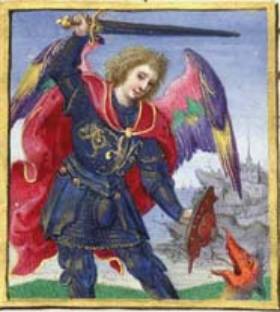
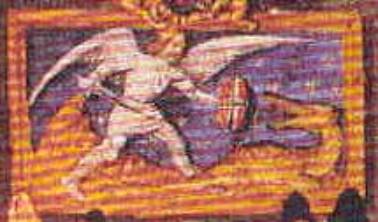
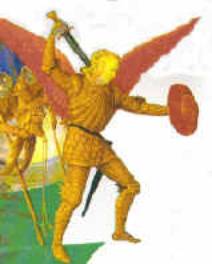
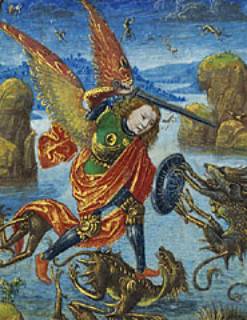
This angel is attacking a dragon while standing in a position that could either be Ochs or a stylized 5th ward. This one, due to the flat perspective of the artwork makes it hard to tell much like the perspective of the I.33 makes it hard to tell which foot is forward.
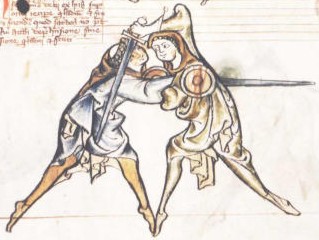
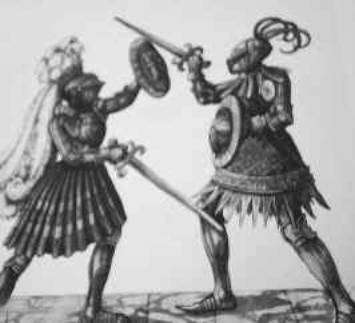
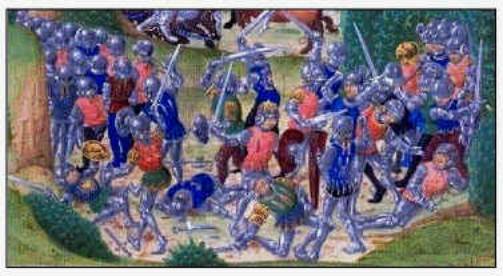
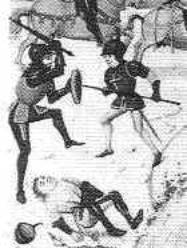
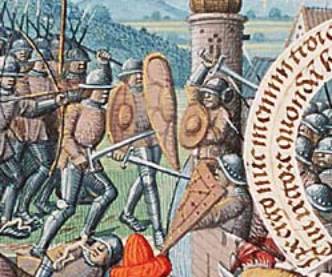
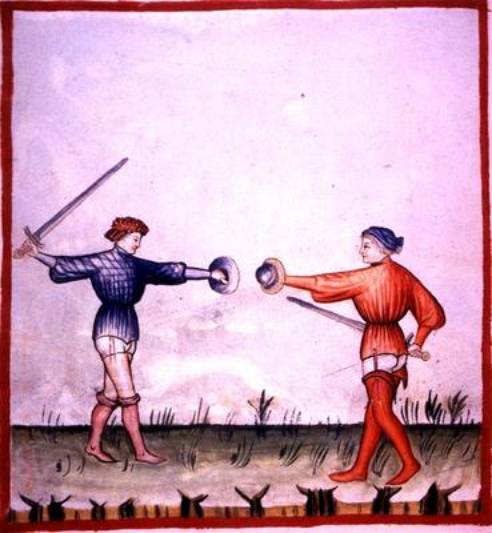
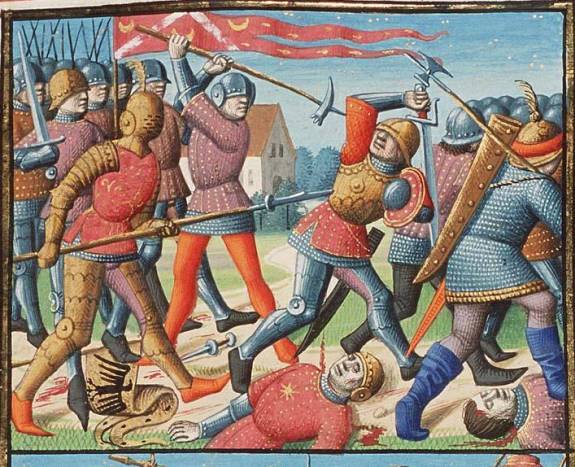
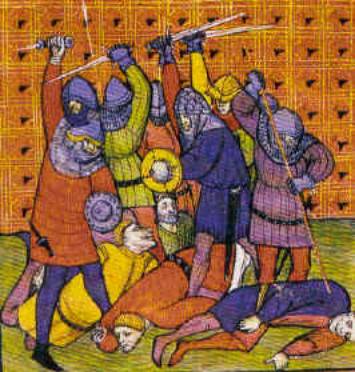
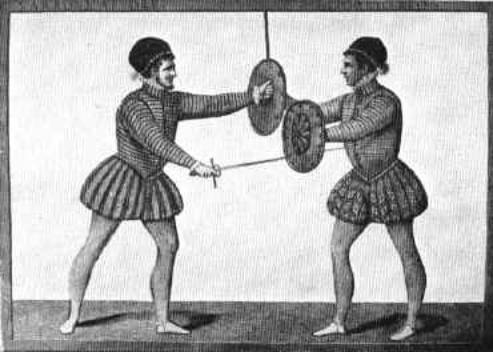
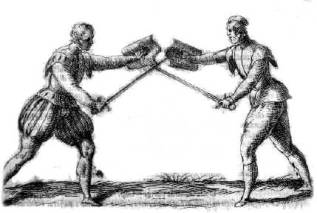
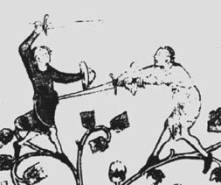
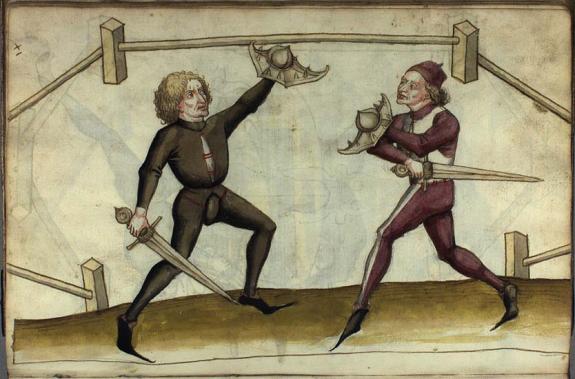
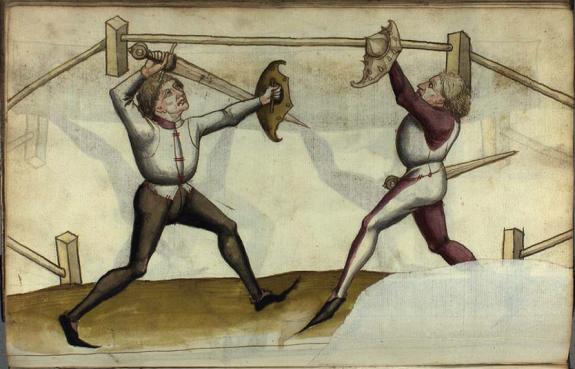
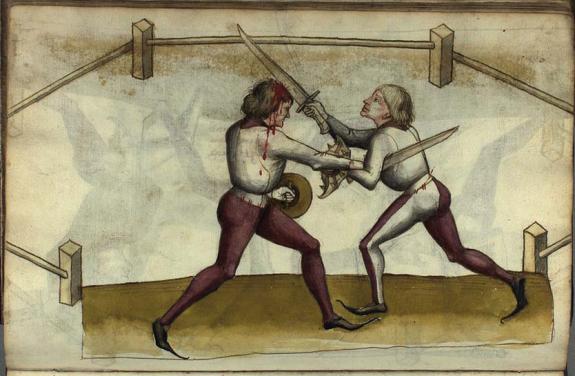
The sword and buckler man on the left is in 3rd ward while his opponent defends his head with his buckler while delivering a thrust. The axe and buckler man in the background on the right is standing in 2nd ward.
The fighter on the left is standing in a variation of vidilpoge (fiddle bow) and his opponent is standing in Ochs.
The fighter on the left defends himself against a thrust while standing in the guard known as “wild boar” which may be a variant of 6th ward.
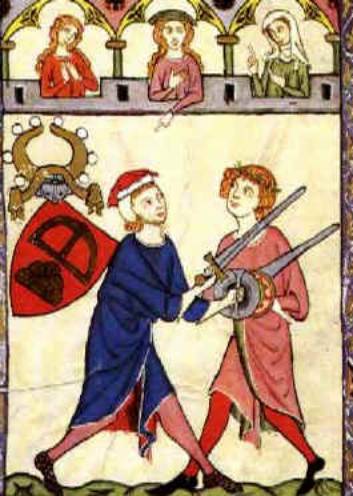
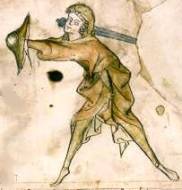
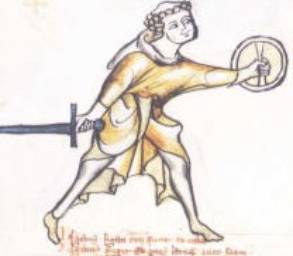
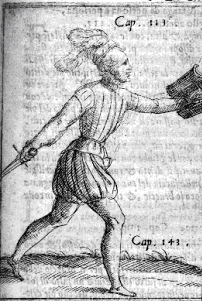
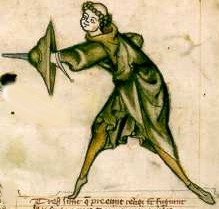
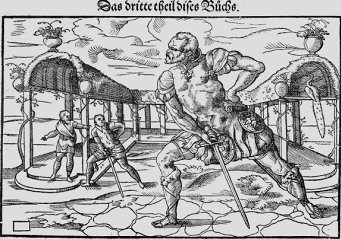
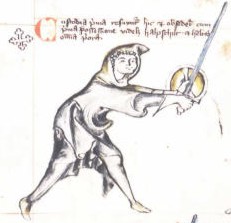
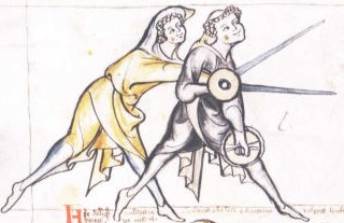
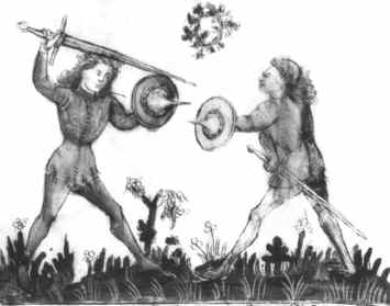
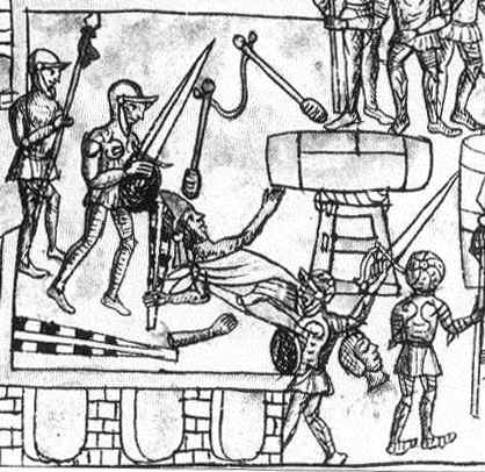
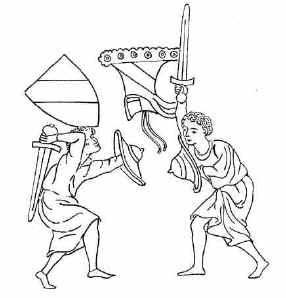
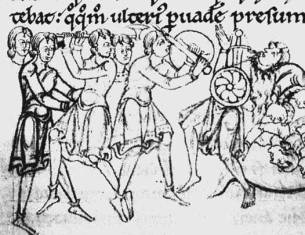
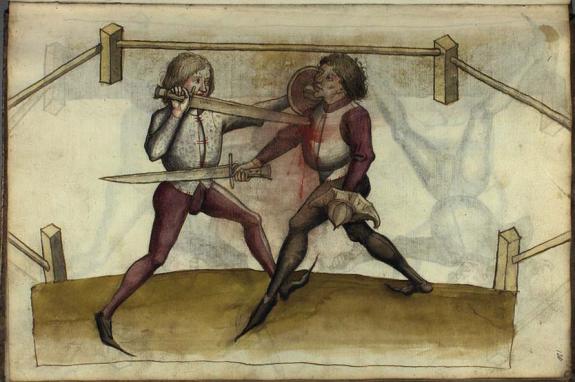
Here we have a perfect example of the fighter on the left doing a shield strike, this image is from the Codex Manesse (Cod. Pal. germ. 848). Please notice that the position of the hand is identical to the position of the hand shown in the I.33.
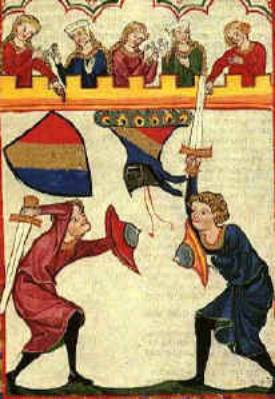
The fighter on the left engages his opponent from 2nd ward, while his opponent takes what appears to be a variation of Walpurgis’s ward, which is a version of 2nd ward and a special ward of the Priest.
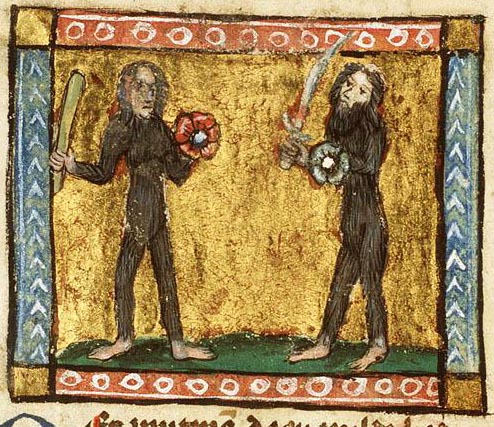
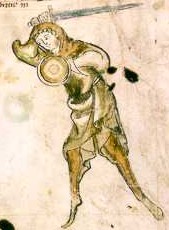
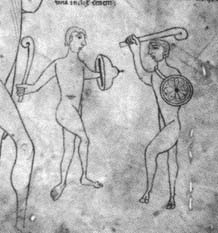
The hairy fellow on the Left is standing in a version of the 5th ward while his equally hairy compatriot stands in Walpurgis’s ward. Ahh, the joys of wild men or “bigfoot” combat.
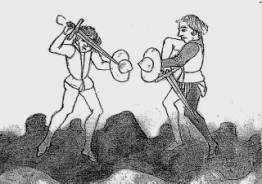
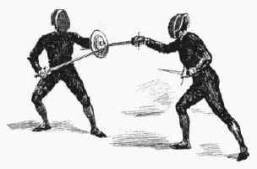
2 fighters both of which are standing in the 2nd ward.
Due to the artwork style of this image, it is hard to tell what ward the figure in the middle is standing in; he could be in Ochs, or a variant of the 2nd ward. I believe he is in 5th ward because the I.33 tells us that 5th ward is given to the right side. The figure on the left is standing in Walpurgis’s ward.
On the left you have two sword and shield men approaching in the variation of 6th known as the wild boar. In the middle you see a fighter with a messer and a buckler standing in the 2nd ward.
The fighter on the left is in 5th ward with his right leg forward, while the fighter on the right stands in the wild boar with his right leg forward. Since the wild boar may be a version of the 6th Ward it is interesting to another illustrated version of this ward with the right leg set in front.
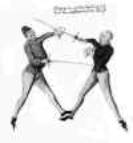
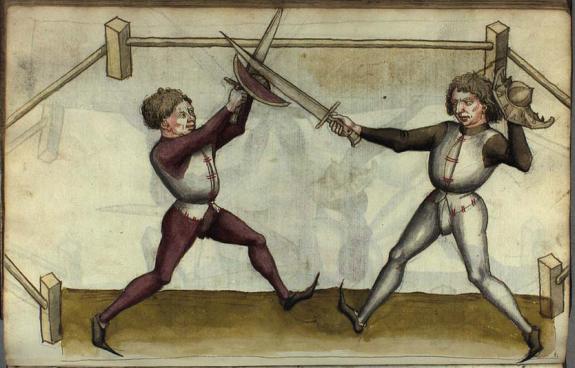
The fighter on the right is receiving a thrust while standing in 3rd ward.
The fighter on the left is standing in Ochs and is warding off a thrust from the fighter on the right. There is nothing here to show any similarities to the I.33, though this may be a fight in transition that could have started from some of the wards of the I.33.
The sword and buckler man on the left appears to be attacking from a variation of the 4th ward.
The falchion and buckler man in the middle of this image appears to be retreating while attempting to defend himself in an odd version of the 4th ward.
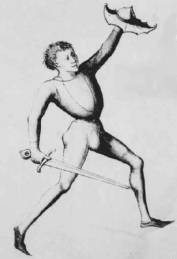
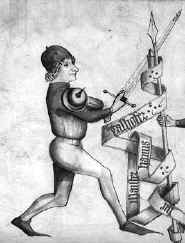
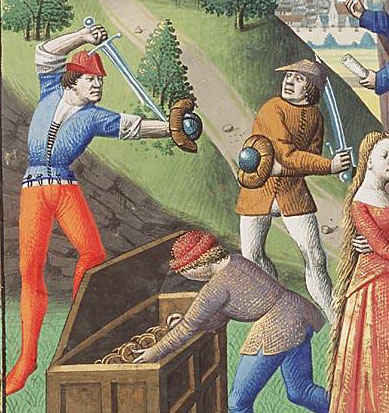
This strangely disturbing image has a sword and buckler man in the background on the left dancing in 1st ward and the man on the right is dancing in a version of the 5th ward.
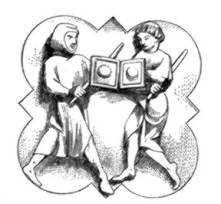
The man on the left is in the ward or guard known as schrankhut (barrier guard), a variation on vidilpoge (fiddle bow). The combatant on the right is in the 3rd ward.
The fighter on the left is in the variation of 6th ward known as the wild boar and the fighter on the right is attacking him with a cut.
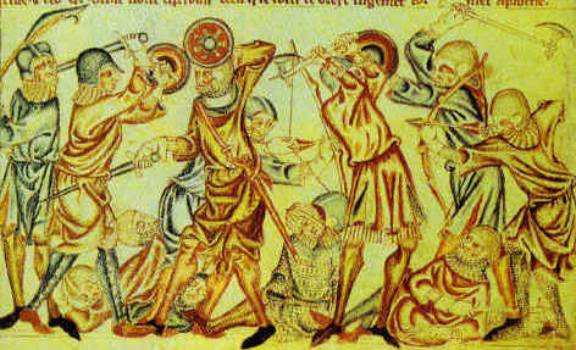
The sword and buckler man in the middle of this image is about to do a downward strike from a high 2nd ward. Interestingly enough the man holding a dagger and a buckler on the left is also in a form of a high 2nd ward, as is the combatant in the yellow gambeson behind him and the fighter in the yellow helmet behind the middle figure also appears to be in the 2nd ward.
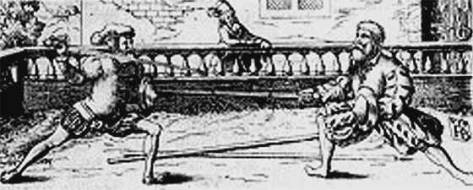
The fighter on the left is in langenort (long point) and the fighter on the right is delivering a thrust with the extended langenort (long point).
The fighter on the left is in the extended langenort (long point) and the fighter on the right is in the 3rd ward.
The sword and buckler man in the upper left corner is in a lazy 2nd ward, the fighter further down is attacking in Ochs, and the combatant to his right is in an unknown position, probably in the middle of transitioning from an attack.
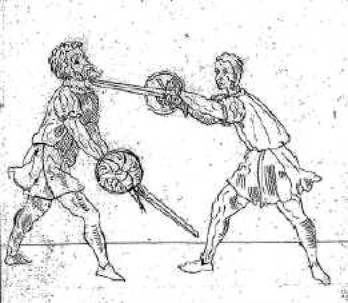
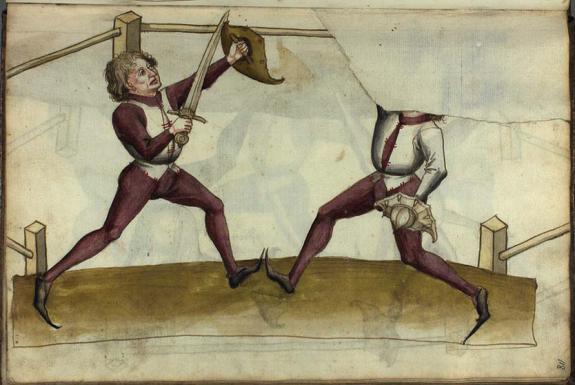
The man on the left appears to be defending against an attack from the fighter on the right by executing a stichslac (thrust strike).
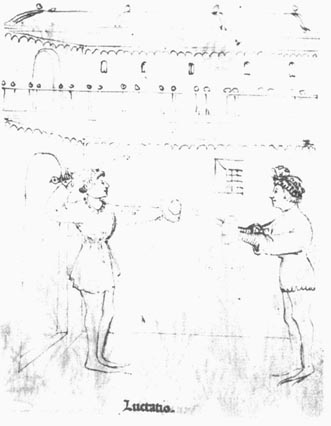
This very faint image has a fighter on the left in an Ochs guard and the fighter on the right appears to be in the opposition known as halpschilt (half-shield). The Latin word Luctatio is used in the I.33 to mean “wrestling”, but in this image it would denote “fencing.”
An Angel standing in the 6th ward with his left leg forward.
The fighter on the left engages his opponent from the 2nd ward while his opponent is either in a high variant of Walpurgis’s ward with his sword point straight up, or in the act of doing a descending true edge cut.

In the middle of this image is a fighter standing in 2nd ward.
Two combatants engaged with each other in a bind.
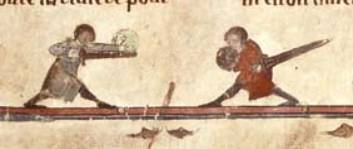
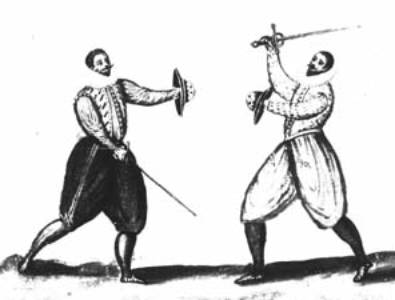
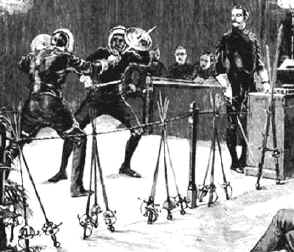
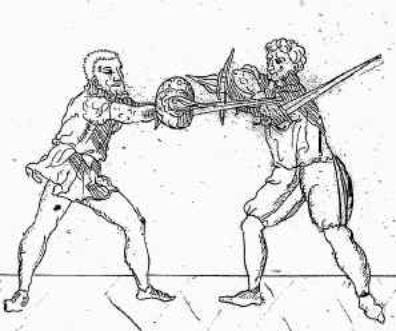
A good example of a non-tracking fight with sword and bucklers, notice that the figure on the right has defended himself with his buckler while separately thrusting to his opponents belly.
Another angel standing in the 2nd ward with his left leg forward.
A sword and buckler defense against a spear thrust. No sword and buckler guards to notice here because the figure on the right is in the middle of an action.
The figure on the left is in an Ochs guard while the figure on the right is in the middle of a thrust while defending his head with his buckler.
An interesting attack by the fighter on the right, the fighter on the left appears to have been in 1st ward and may be in the middle of the action from the I.33 know as “falling under the sword and shield.” The fighter on the right may have been in the obsessio (opposition) known as halpschilt (half shield) and because the fighter on the left may have hesitated, the fighter on the right may have exploited that, as counseled by the priest, with a variation of a thrust combined with a kick to stifle his opponent’s sword arm. This is just speculation, but it is a valid one.
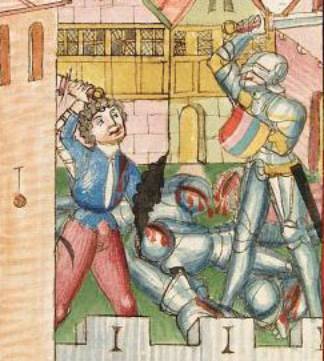
Another interesting plate to speculate about; the fighter on the right is in the middle of an unknown action, possible a cut from the 2nd or the 4th ward or this may be a thrust from halpschilt. The defender on the left may have started in 1st ward, and dropped to one knee while defending his head with his buckler and striking his opponent from underneath his arm. He could have also done a similar action from 6th ward with a thrust instead of a cut. This is fun speculation, but speculation nevertheless.
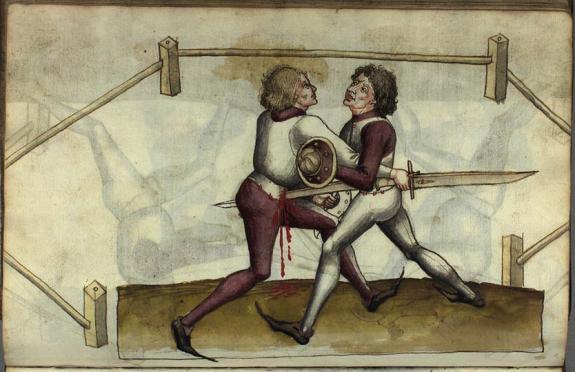
The fighter on the left has seized his opponent’s sword arm with his left arm, but failed to acquire his buckler arm as well allowing his opponent to defend himself against an attack to the head. This will probably end in wrestling similar to ones shown in the I.33.
The fighter on the left is in Ochs, while his opponent delivers a thrust.
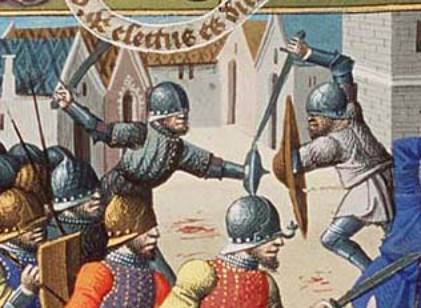
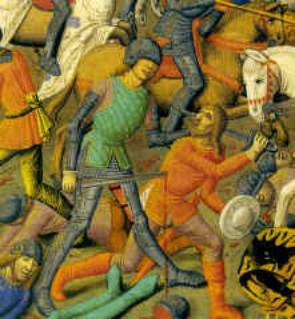
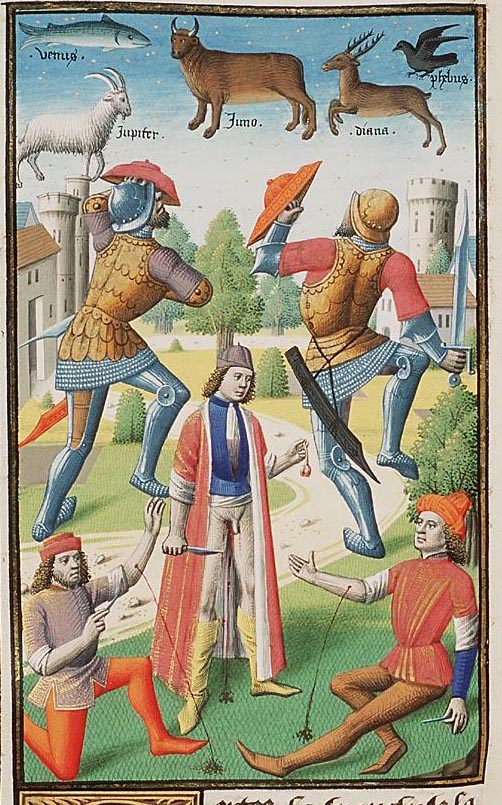
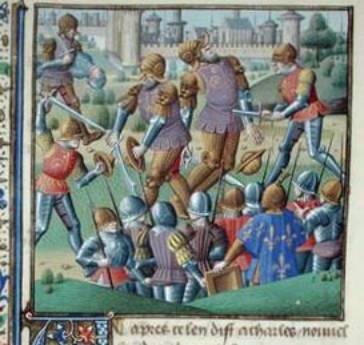
The middle figure appears to be attacking from the 3rd ward. He has either killed or pushed his opponent.
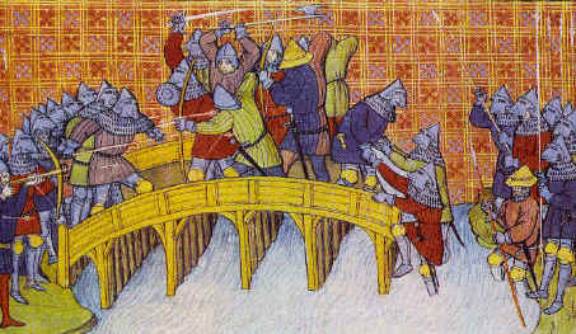
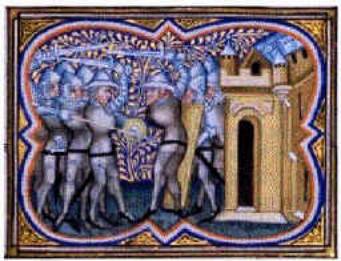
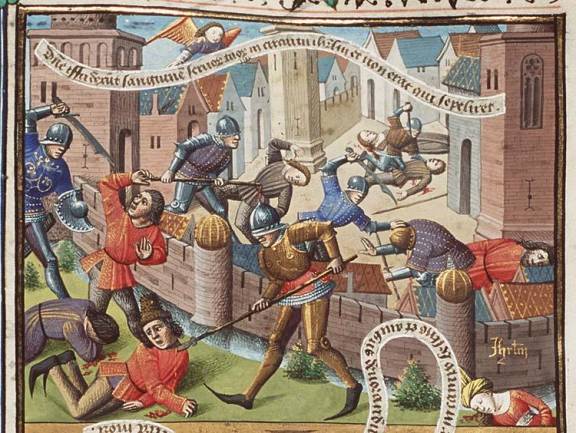
Note the figure on the front lines in the middle of the bridge standing in 2nd ward.
Saint George in a variant of 2nd ward known as the St. George Guard.
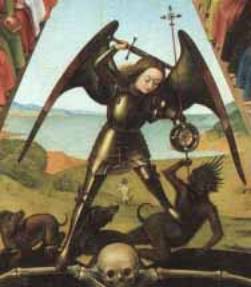
Saint Micheal in what appears to be the guard of Ochs on the Left and on the right.

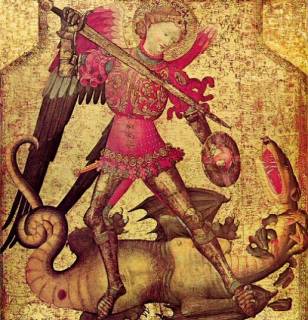
Saint Michael in attacking from the 2nd ward.

This picture is interesting because it shows a combat between a man armed with a sword and buckler against a man armed with a long sword. The sword and buckler fighter appears to be in the middle of an over binding with the long swordsman, though he could also be in a variation of vidilpoge (fiddlebow).
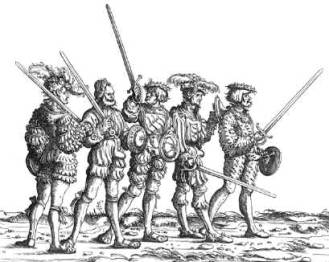
Please note that the figures on the Left are standing in a relaxed 2nd ward or possibly the Walpugis ward, the figure in the middle appears to be examining his sword while the next figure is in a relaxed wild boar and the figure in front is in a relaxed halpschilt (half shield). It is interesting that even at rest these figures have taking a form of a specific guard with their weapons.
An attacking figure on the left, and a defending figure on the right. No specific guards, just an undefined action.
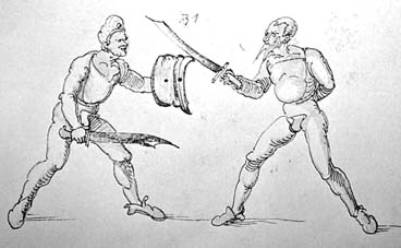
Sword and Buckler from the Thott version of Talhoffer
* Please be aware that while I have identified the images in Talhoffer’s plates with specific guards by name, they were not so labled by Hans Talhoffer himself. I have done so for the sake of clarity through comparison and interpretation only and I do not intend to mislead others into thinking that Talhoffer so named his images.*
The fighter on the left stands in Nebenhut, a version of the 5th ward, the fighter on the right stands in the 1st ward.
The fighter on the left is in vidilpoge (fiddlebow) and the fighter on the right is in an unknown ward, but it may be either 2nd or 4th.
The fighter on the left is in schrankhut (barrier guard), a variation on vidilpoge (fiddlebow). And the fighter on the right stands in the 5th ward.
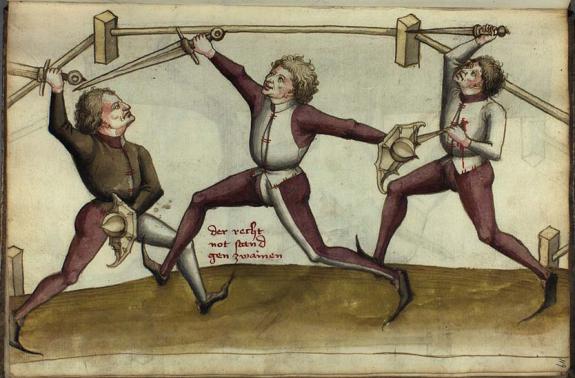
This figure in the middle shows the open fight of Talhoffer, the fighter on the left is in the 2nd ward. The caption “Der recht not stand gen zwaimen” translates as “The right way you need to stand against two men.”
A perfect example of tying your opponent up with your left hand, this has probably happened from a bind. Notice that due to the open, or non-tracking manner that Talhoffer teaches to use the sword and buckler, the fighter on the right was unable to gain control of both arms as in the example from the I.33. This may be an advantage to the open fight.
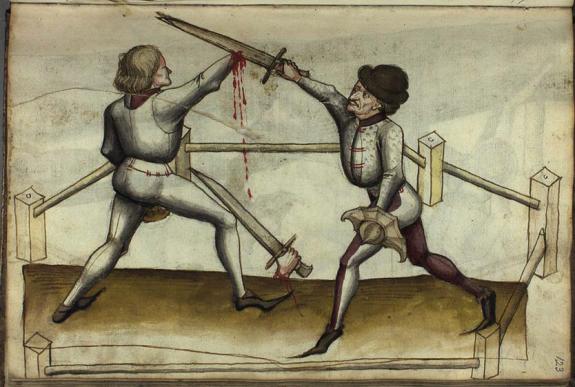
The fighter on the left is doing a variation of a stichslack (thrust strike).
The fighter on the left defends himself against a strike from either 2nd or 4th ward. Notice the way the buckler is protecting his sword hand. This plate has a strong resemblance to plate #41 at the top in the I.33. Two main differences are the fact that the fighter on the left has the knuckles of his right had turned down, and the defender in the I.33 has the knuckles of his right hand turned up, while the fighter on the right in the above image is not protecting himself with his buckler as is done by the scholar in the I.33. The difference in hand positions by the defenders may be that a single edged messer is being used in Talhoffer manual and a double-edged arming sword is in use in the I.33.

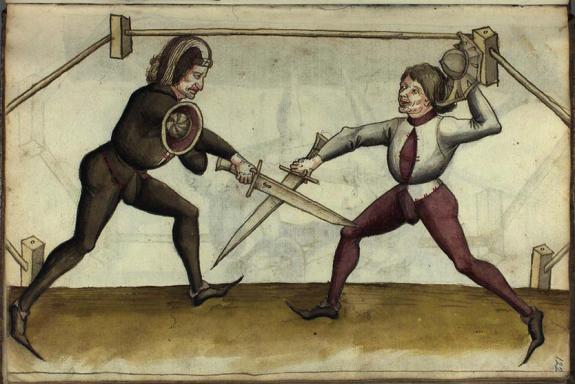
The fighter on the left has done a downwards cut to a version of halpschilt (half shield), while the fighter on the right defends himself with the krucke (crutch). This plate bears a strong resemblance to the top of plate #8 in the I.33.
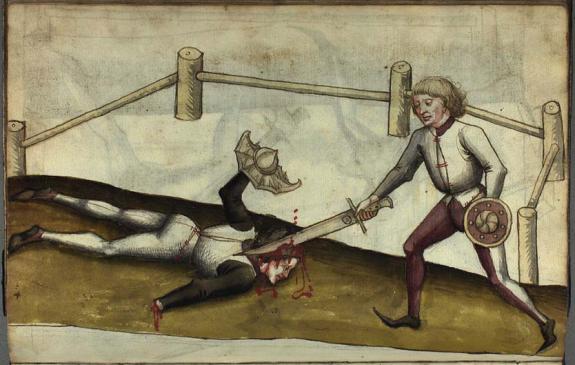
Here the fighter on the right has used his cover with the krucke from the previous plate to seize his opponent with his left arm and simultaneously put a thrust through his opponent’s lower body. This plate is very similar to the bottom of plate #8 in the I.33.
The fighter on the left may be in the middle of a similar action to the “rebind and step” of the I.33, over binding his opponent on the right. This is a similar position the top of plate #4 and the top of plate #6 in the I.33, although the positions of the bucklers are slightly different, the bind is the same and may have even been arrived at in a similar manner to the one in the I.33.
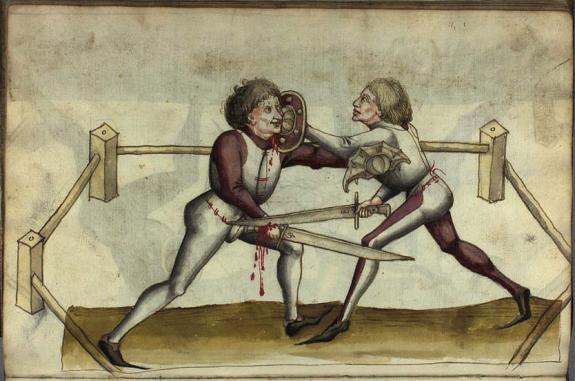
The fighter on the right is doing a form of a shiltslac (shield strike).
This plate is a good illustration of why the I.33 protects the sword hand with the buckler while cutting and is one of the weaknesses of a system where the sword and buckler do not track together.
No similarities here, but it is good to finish off this series of plates. The other series of plates from Talhoffer are similar to these, for durations sake we will leave Talhoffer’s sword and buckler here.
In conclusion, it can be determined that there are a great number of similarities found in iconographical evidence and in other fight manuals to the I.33 to show a strong possibility that all men fought in a similar manner with the sword and buckler. However, the I.33 states that it shows the seven wards that all men will naturally use, therefore the similarities may end there. The true proof of whether or not the sword and buckler was used in a consistent manner across Europe resides in further study of all the evidence that we have through the comparison each known individual fighting system to one another in order to find both the similarities and the differences between them. Meanwhile, the similarities to the I.33 shown here are of interest in furthering our current knowledge of the known use of a very popular method of fighting and dueling.
August 2007
|
|
|||
|
|
|||
|
|||