|
||||||||
|
|
||||||||
|
By Stewart Feil One of the simplest yet most essential training tools for Renaissance martial arts practitioners is the pell. It is virtually a compulsory piece of training equipment. A pell is simply a target usable for practicing strikes that roughly simulates a human target. Pell or pel, is from the Latin for Palus, Palos, Palorum, a pale or stake. It is essentially a post quintain, a tree trunk or a wooden post of man height placed in the ground and used for striking against. The pell is used to learn proper striking technique, including power, energy focus, accuracy, and range. In the same way that boxers use the heavy bag and Eastern Martial Arts practitioners use striking targets to train, ancient Roman and Medieval European swordsmen used the pell. Pell work is a great way to train alone for any martial art weapon, but its results are best in conjunction with partnered free-play, technique exercises and solo drills, and for the purposes of swordsmanship, test-cutting. Primarily, the pell should be used for training to strike a resistant target with force and accuracy. Pell exercises should not be not done lightly but intent as if really fighting and trying to injure an opponent. There is little value to exercising muscles against a practice target softly or slowly. Though developing force in strikes is a major goal of pell work, you need to also strike with precision and good technique and accurate range. Without control of your strikes you have less chance to actually strike a target. You must coordinate the movements of your entire bodyfeet, arm, handsto be an effective swordsman, and the pell is a great place to start building this coordination. Your arms, trunk, and feet need to move in coordination in order to strike with the proper focused force. As you move around the pell to work traversing actions remember to focus on this coordination. A modern pell for your training should be constructed
of materials robust enough to withstand powerful strikes and not
fail. Train on the pell using a waster (wooden sword) and save your
steel replicas for other activities. The waster is an essential
piece of historical training equipment for Medieval and Renaissance
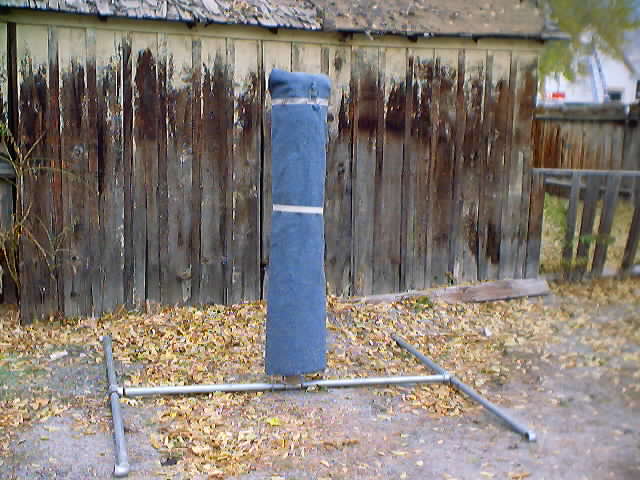
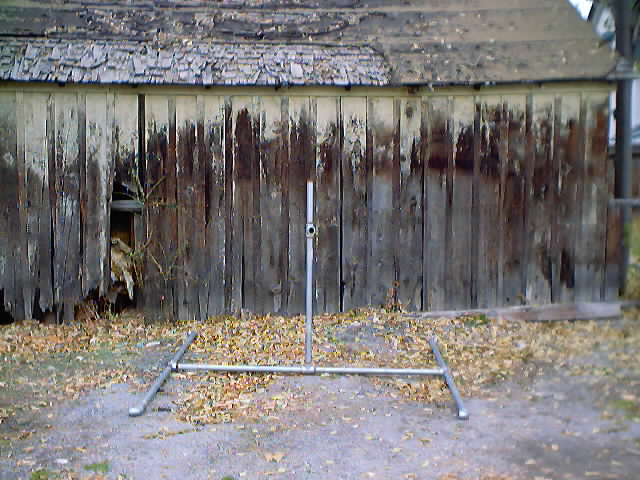
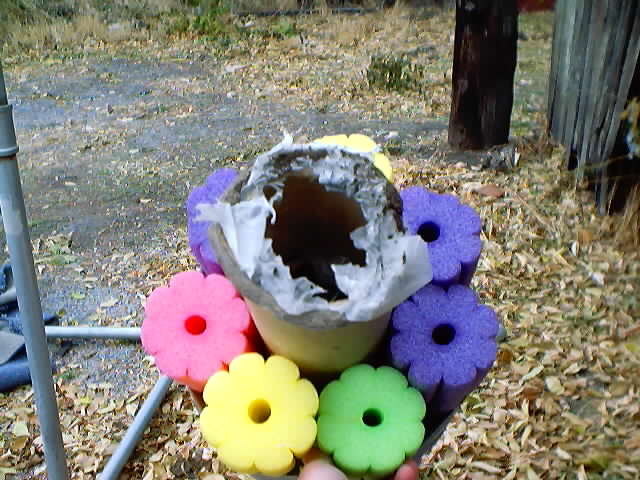
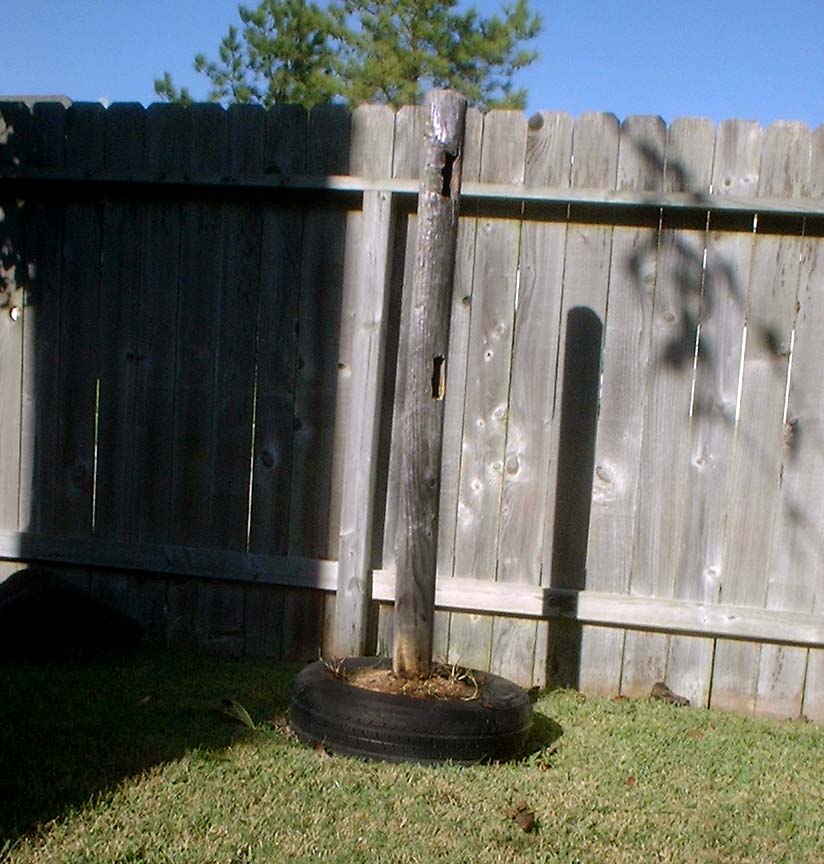
fencing that dates back to the There are two main varieties of pell that can be usedstanding pells and hanging pells. The following descriptions of some ways to construct these and the explanations of their advantages and disadvantages will hopefully help you decide what type of pell you want to build. It will also give you some ideas as to what would most help in your training. Standing Pells: The standing pell is just that, a pell that stands on its own. It is the true historical pell. From this type there are myriad ways to construct various types. The Post is the simplest form of pell. In fact you dont even really need to construct anything to use this type of pell. Look around for a large tree whose branches are high enough not to hinder a sword strike, or fence post or even a telephone pole. All of these can be used for beginning trainingnot striking hard at first, but rather working on the aspects of accuracy in conjunction with proper body mechanics and footwork. If there is the slightest crack in your waster, or if the grain isnt lined up perfectly you will split your waster on one of these pell targets. A good and cheap pell is to buy a long wooden post such as used in the construction of fences, dig a shallow hole, stand the post upright and secure it in place with quick drying concrete so that your desired height of the post still remains above ground. This pell is stationary and will suffer from exposure to the elements on top of the beating you will give it with your waster. You can also use an old tire filled with quick-drying cement as the base so that your pell is moveable. Repeatedly hitting a solid wooden post is unforgiving on your waster, but a pell can be easily padded with foam and cloth or old carpet to take some of the bite out of it. To make an even more portable frame-pell you can use a similar pattern to what you would use for the base of a test-cutting stand. It is easiest to use two 2 by 4s of about three feet in length. Cut notches so that they fit together in the middle in an x or cross shape. Mount a 4 by 4 of five to six feet in length in the center as the body of your pell. You may wish to round off the corners so that there is not a corner capable of biting into your waster or any padding you apply to the pell. The longer you make the base pieces the more stable this pell will be, but that also will decrease mobility. Depending on the vehicle you drive and how large you decide to make your pell frame, this pell can be extremely mobile. You can take it with you when you go to meet your training partners for the mutual benefit of the whole group.
Hanging Pells:A hanging pell is simply a pell that is suspended from a ceiling, frame, tree, or support beam. The simplest hanging pell, though by far not the cheapest, is a boxers heavy bag. A heavy bag will eventually wear from being struck with a waster and is definitely not cost efficient to replace. Still it is useful, especially if you have a standing post pell and want to hit something that reacts a little more dynamically. In fact, probably nothing is better as a pell than a large canvas punching bag hanging from a chain. It will realistically give when struck, is not destructive on either wasters (or even blunt swords), and unlike a stationary post can be made to move and swerve. The heavy bag will react differently to strikes depending upon its weight, so if you stuff it with cloth rags it will move more than if you stuff it with sand. I recommend staying away from water bagswhile they are easy to adjust in weight they are also more likely to break from the concentrated impact of a swiftly moving waster. The larger the bag the better it is as a pell. If you have no bag you can try using a large section of rolled up old shag carpet. A hanging pell has an advantage over the standing pell in that it moves more dynamically and reacts to your strikes. If you want more than just a little swing, simply find a higher place to hang your pell from (15 25 off the ground) and use a longer length of chain or rope. You can start the pell swinging first, or simply let it swing in reaction to your strikes. This pell will run away, forcing you to give chase and change your direction depending upon which direction your target it taking. Keep in mind that your pell will only run so long before it reaches the apex of its swing, and then it will charge back at you. Having a moving pell is the best way to train for a moving opponent when you have no partner to train with. Something to avoid using as a pell however is an old automobile tire. While these have been popular among some groups for years, they offer way too much bounce on impacts, thereby tending to distort recovery and follow-through, and their shape is not conducive to realistic targeting (a large hollow center with a curving exterior of small surface area). Another form of pell is the quintain. Historically, a quintain was a jousting tool consisting of a small target at the end of an arm mounted on a pivot with a dangling weight on the other arm. Traditionally, this target was used as a part of training for mounted combat with a lance. The rider tried to hit the target at a quick enough speed to prevent himself being struck by the other end as the arm swung back around from the impact. The quintain pell is a modern version of this that is basically an attempt to make a pell that hits back and forces a greater awareness of the situation. Tie a length of rope to a tree or other support. Tie the rope to some type of swiveling eyebolt, then attach a hardwood dowel (1 1 1/2 diameter, 48 length) to the eyebolt so that it hangs perpendicular to the rope. Hang two more dowels, cut down to 36 from eyebolts at either end of the main dowel. Hang a small strikeable target from the central eyebolt at about head to shoulder level (you can hang a second target from the first to simulate a full body). Pad the arm dowels extremely well. They will hit you hard so it is a good idea to wear head protection as well. The quintain has the great advantage of dynamically striking back at you, but it cannot move as freely as hanging bag pells. If you are training with a single-handed weapon this is an ideal pell to help you coordinate the use of a second weapon, shield, or buckler with that of your sword. The quintain is by far the most dangerous type of pell to use. Remember safety first. Make sure your head is protected, even the back of your neck. Be sure to experiment with the reactions of this pell at a slower speed before you just start beating on it. Some Advice on Training with a Pell:
Remember that even if your pell is stationary you can still improve your footwork and movement by changing your angle of attack, moving in and out of range, and cutting and thrusting from opening to opening (high, low, left, right). Vary what attack you use, and practice at using every technique you know to strike the pell. Practice the accuracy of your thrusts intermingled with your cuts as well as feints. Though your first reaction to having a target you can truly strike may be to see just how hard you can strike and how fast you can cut, remember that you are training your muscles to naturally execute a technique. Take time to evaluate your edge alignment. Slow down if you feel clumsy or inaccurate in your strikes. Just as you should spend time learning to cut at the air slowly so that you know that you are using the proper technique, spend some time striking the pell slowly until you know you are doing it right. Also, remember to hit with the correct portion of your weapon for the range you strike from. The pell can be a great way to increase the strength needed for continual fighting. One way to accelerate this strength-training exercise is to use either a double-weighted weapon as the Romans did or to wear wrist weights. Be careful when training with additional weight that you lose none of the form that you had without the weights. You will tire more quickly so be sure that every cut is a good one and that you are not training yourself to flail, but rather strike with precision. Focus your strikes. Dont waste energy where it does not need to be expended. Try to strike deceptively without telegraphing and with all the energy of the cut concentrated into the point of contact. You need to exert energy to accelerate your weapon, but dont spend all of your energy in initial acceleration. Cut into your target, not just at your target's surface. If you feel your hand or wrist hurting from strikes, try not to grip your weapon so tightly. Spend time training at the pell wearing all of the possible equipment you might wear while sparring. If you wear a helmet or fencing mask, spend some time helmeted or masked. If you are training for fighting in full armor, be sure to spend some time working the pell in full armor. If you fight in a t-shirt, spend time training at the pell in a t-shirt. Practice makes permanent, perfect practice makes perfect. Dont do the wrong thing so many times that it becomes permanent. Be accurate. Coordinate the movements of your entire body. Practice regularly. The pell can be used daily for a mere 10 or 15 minutes to help improve your physical condition and swordsmanship. The pell is a useful and important tool for practicing historical swordsmanship. It is no wonder it so frequently appears in historical sources. See also On the Pell |
|
|
|||
|
|
|||
|
|||